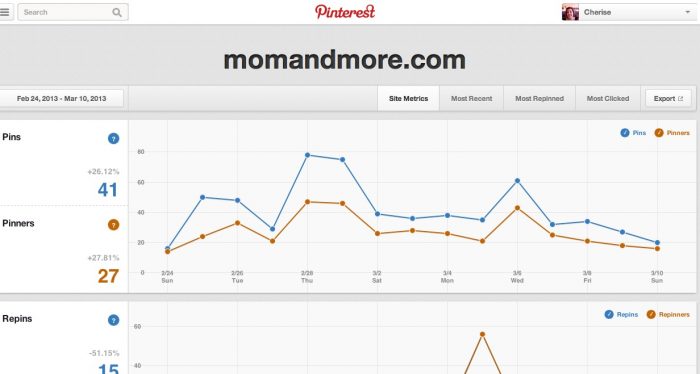
Okay so you have a blog and you use Pinterest, wouldn’t it be nice to visually see how many of your posts are pinned, re-pinned and clicked on? Well Pinterest has finally answered our pleas!
Here are the steps on how to Verify your blog with Pinterest and then view your stats:
- Log into Pinterest
- Go to Your name over the right, then settings and scroll down to where it says “Website”
- Insert your Website URL
- Click “Verify Website”
- You have two choices you can Upload a file to your Host or add a Meta Tag to your blog code. I tried the Meta Tag but it wouldn’t work for me so I uploaded the file. For me since I have a self-hosted WordPress blog, I logged into my Hostgator CPanel and just uploaded the file Pinterest told me to. Just follow the directions and be patient. Once I uploaded the file and clicked “Verify” it took forever to actually verify! Don’t be intimidated either, it really is easy to do this!
- Okay once you are verified, you need to click your name again on the top right and go to “Switch the the New Look”.
- Then go back to your name and click “Analytics”
There you go!
Here is a sample of what mine looks like:


Cat Davis | Food Family & Finds says
I’m so in love with this feature.
Katherine G says
This was so informative. Thanks.
Cher says
Sure! It is so nice it is finally offered!
Julie Jones says
I love looking at the most repinned and the most viewed so I know which of my posts people enjoy reading.
Cher says
It is great that they finally offer that!